Student ID Cards Maker Screenshots
Student ID Card Maker designs it easy to create student ID cards for college, university, and school. With the help of this program, you can create and print multiple student ID cards at once, each with a unique text and barcode value. It provides various designing tools, including text, signature, barcode, watermark to design ID cards.
Software provides option to add a photo to student ID card by using the camera setting option or by browsing an image that has been saved on the user PC. Program has a cropping feature to crop one or more images to create ID cards for multiple students. You can choose an ID card design from a library of pre-loaded or custom templates using the ID Card Software. It provides Live Group and Batch Processing Modes to create student ID cards using Excel data. Create ID cards with different shapes, such as rounded rectangle, ellipse, or rectangle. Software offers flexible print setting options to print designed ID cards.
# Process to create and print Customized Student ID Card using Software:
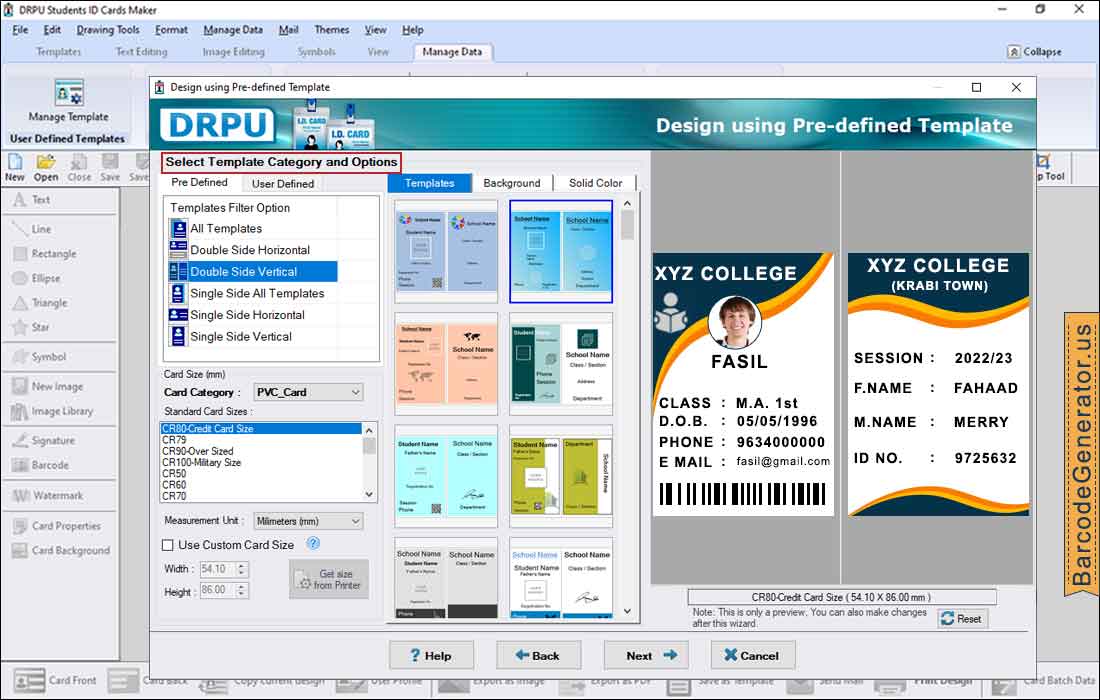
Step 1 : To design a student ID card, choose between "Design using a pre-defined template" and "Live Group Batch Processing Mode".

- To create student ID cards using predefined templates or custom templates, choose 'Design using a pre-defined template' option.
- If you want to design and print multiple student ID cards using Excel Sheets, select 'Live Group and Batch Processing Mode'.
- Select predefine templates option (All templates, Double or single side vertical/horizontal) and Card category (PVC_card, Paper_Slip).
- By using custom card size option, you can specify a standard card size or have the printer determine the size.
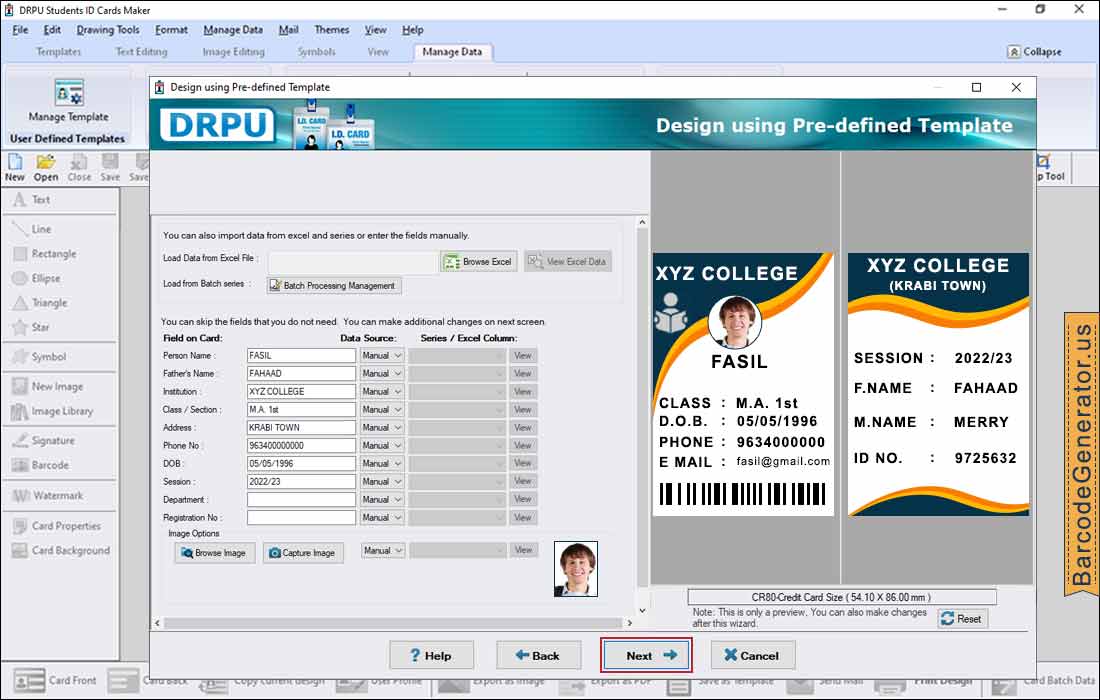
Step 2 : Now click on 'Fill user profile' button to fill user's details.

- Browse Excel file that contains user's details to fill user's information.
- You can manage Excel data using the "Batch processing management" option, including importing, editing, and updating data.
- Using the data source option, enter user information such as name, phone number, and registration number (manual or series).
- Users can browse images from any location or take a picture with a camera for their profile.
- To enter user information, choose Front or Back Side from the Select Sides menu.
- Click on Image Editing Tab to change the properties of image.
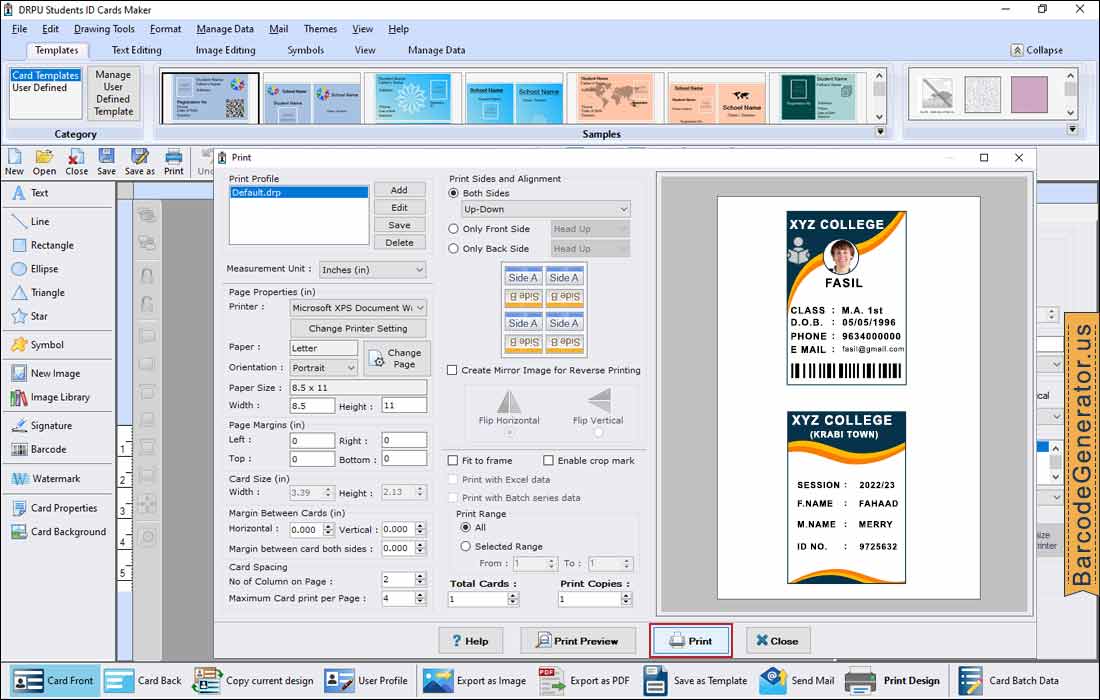
Step 3 : To print your ID Card, Go to print button in toolbar, set all printing settings and then click on print button.

- Using the printer settings option, define the page properties (size, height, and width); adjust the print margin and spacing (vertical or horizontal).
- Set the vertically or horizontally margin between cards as well as the margin on both sides.
- Define the printing range, number of columns on page, and the maximum number of cards that can be printed on a single page, as well as other options.
- You can view a preview of the designed student ID cards before printing.
- Click the print button to print the student card after completing the print settings.